


How to Super Secure Your WordPress Admin from Hackers – Changing Admin URL, Adding IP Restrictions & htpasswd
Updated on: June 18, 2020
6 mins read
Are you experiencing multiple bruteforce attempts on your WordPress admin area? If yes, then it’s high time you did something about it. In this tutorial, we will explain how you can change the default URL of your WordPress admin page. WordPress sites, by default, have one of these admin URLs – /wp-admin, /admin, /login on their website, which is widely known and poses a huge threat. Hence, we advise changing that.
Changing your default admin URL will add an additional layer of security to your login area by restricting arbitrary access. By protecting your admin area from unauthorized access, you can save yourself from an array of common security threats.
Changing the default admin URL is just one of the security methods to secure your admin area. Follow these crucial tips given in this extensive WordPress security guide to fully secure your WordPress.
1. Changing the Admin URL
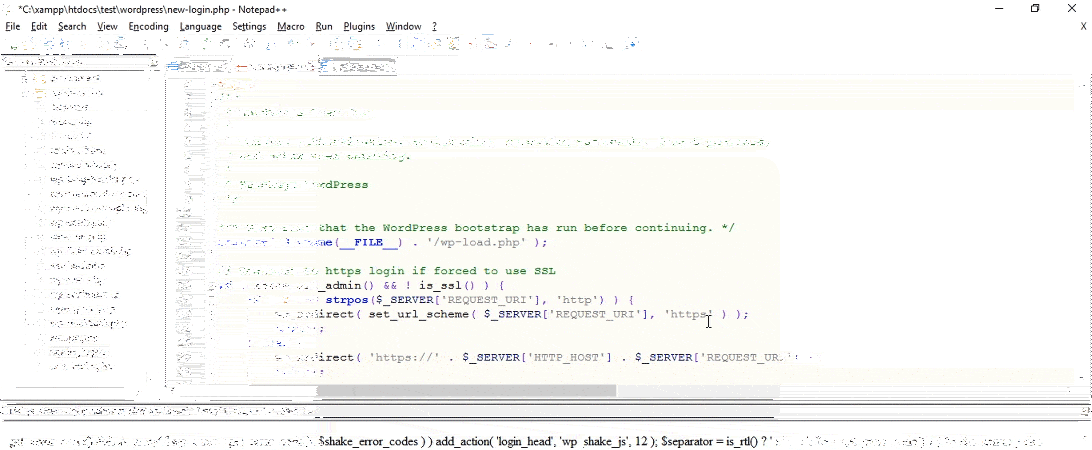
You might know that by default, the “wp-login.php” file comprises of all the code that creates the login page. It also manages the login sequences. You can make use of the code from “wp-login.php” in your new file.
It is a simple but smarter way to alter the name of your “wp-login.php” file and it will eventually alter your login URL. You only need to access the files of your website and a text editor.
The steps are explained below:
- Creating a New File: Open your text editor and create a new file. Now save it into the root folder. Give it a name whatever you want to see in place of your login URL.
- Copy-Paste the Code: Now, you need to open up the “wp-login.php” file, select the code and then copy it into the new file. Don’t forget to save it.
- Discover and Replace the String named “wp-login.php” You need to find and exchange all the occurrences of “wp-login.php” in the file with the name of your new file. If you are using Notepad++, then you can use the function, called “find and replace” to save your time.
2. Using .htaccess for Hiding the WordPress Login Page
For adding further security, you can conceal your WordPress login page through the utilization of the .htaccess file of your website. The two usual ways to conceal your login page with .htaccess are:
- Through the utilization of .htpasswd to need a password for accessing wp-admin
- Limiting access to wp-login by IP address
Both of these ways have come straightforwardly from the WordPress codex entry on brute-force attacks, therefore, you can relax by knowing that they are WordPress approved.
How to Secure WordPress Login With .htpasswd
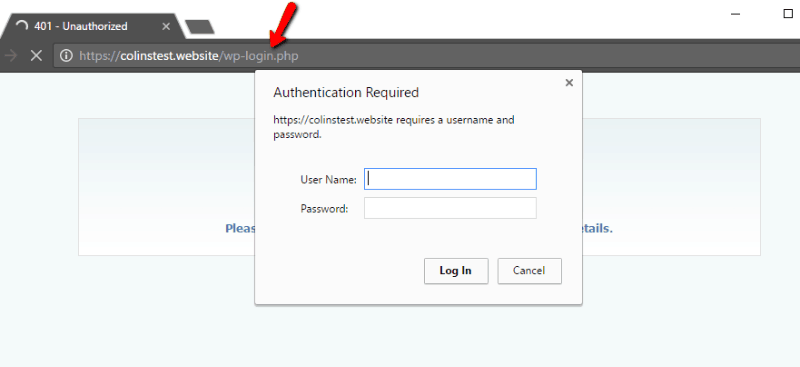
With the help of this procedure, a person attempting to access your wp-admin panel will get extra password this prompt. No username or password means, no login page and it is very simple to set up. You need to follow these three below-mentioned steps:
- Step 1: You need to go to Htpasswd Generator and then submit your preferred username and password. After that, you need to click Create .htpasswd file. The particular tool will encode your password automatically and provide you with the text to add to your .htpasswd file:

# Stop Apache from serving .ht* files
<Files ~ “^\.ht”>
Order allow,deny
Deny from all
</Files>
# Protect wp-login
<Files wp-login.php>
AuthUserFile ~/.htpasswd
AuthName “Private access”
AuthType Basic
require user yourusername
</Files>
[/code]
Don’t forget to replace “yourusername” with the real username that you have used in your .htpasswd file. You have done it. Now, enjoy this new security.
You need to remember that it might not work with each and every hosting platform. Some of the companies are involved with other ways to conceal the login page through the contact to support.
How to Hide WordPress Login by IP Address with .htaccess
Another way through which you can use .htaccess for concealing your WordPress login is limiting by IP address. A person, who has an authorized IP address, will view your normal WordPress login page, while rest of the others will see the following:
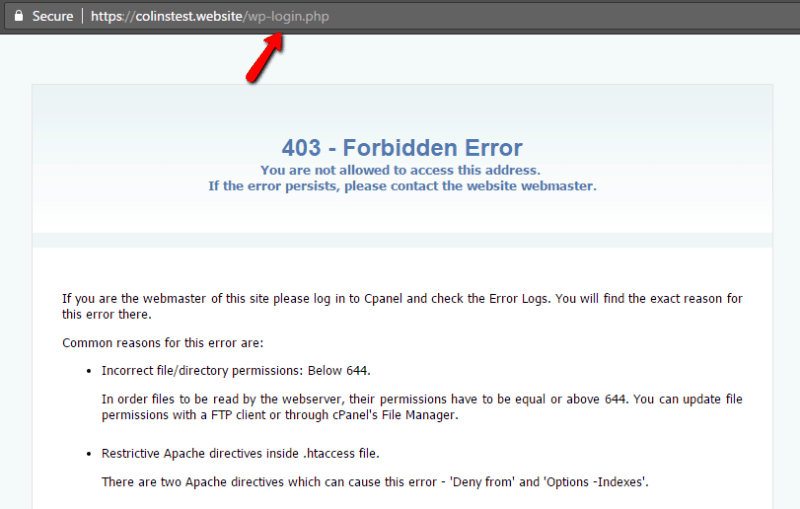
It is a good procedure in case you hold a static IP address and if not so many individuals need to access your website. Alternatively, you can proceed with the .htpasswd method. For this setting, you need to add the below-mentioned bit of code to the head of your .htaccess file. Additionally, you can discover your .htaccess file in your WordPress site’s root directory.
[code inline=”false” scrollable=”false”]
<IfModule mod_rewrite.c>
RewriteEngine on
RewriteCond %{REQUEST_URI} ^(.*)?wp-login\.php(.*)$ [OR]
RewriteCond %{REQUEST_URI} ^(.*)?wp-admin$
RewriteCond %{REMOTE_ADDR} !^123\.123\.123\.123$
RewriteRule ^(.*)$ – [R=403,L]
</IfModule>
[/code]
You need to replace “!^123\.123\.123\.123$” with your IP address’s numbers.
If you want to permit multiple IP addresses for accessing to your website, then you need to add a new line for all addresses. For an instance, to give access to a second IP address, it will look as follows:
[code inline=”false” scrollable=”false”]
<IfModule mod_rewrite.c>
RewriteEngine on
RewriteCond %{REQUEST_URI} ^(.*)?wp-login\.php(.*)$ [OR]
RewriteCond %{REQUEST_URI} ^(.*)?wp-admin$
RewriteCond %{REMOTE_ADDR} !^123\.123\.123\.123$
RewriteCond %{REMOTE_ADDR} !^223\.223\.223\.223$
RewriteRule ^(.*)$ – [R=403,L]
</IfModule>
[/code]
Now, your login page is concealed from anyone having a non-authorized IP address.
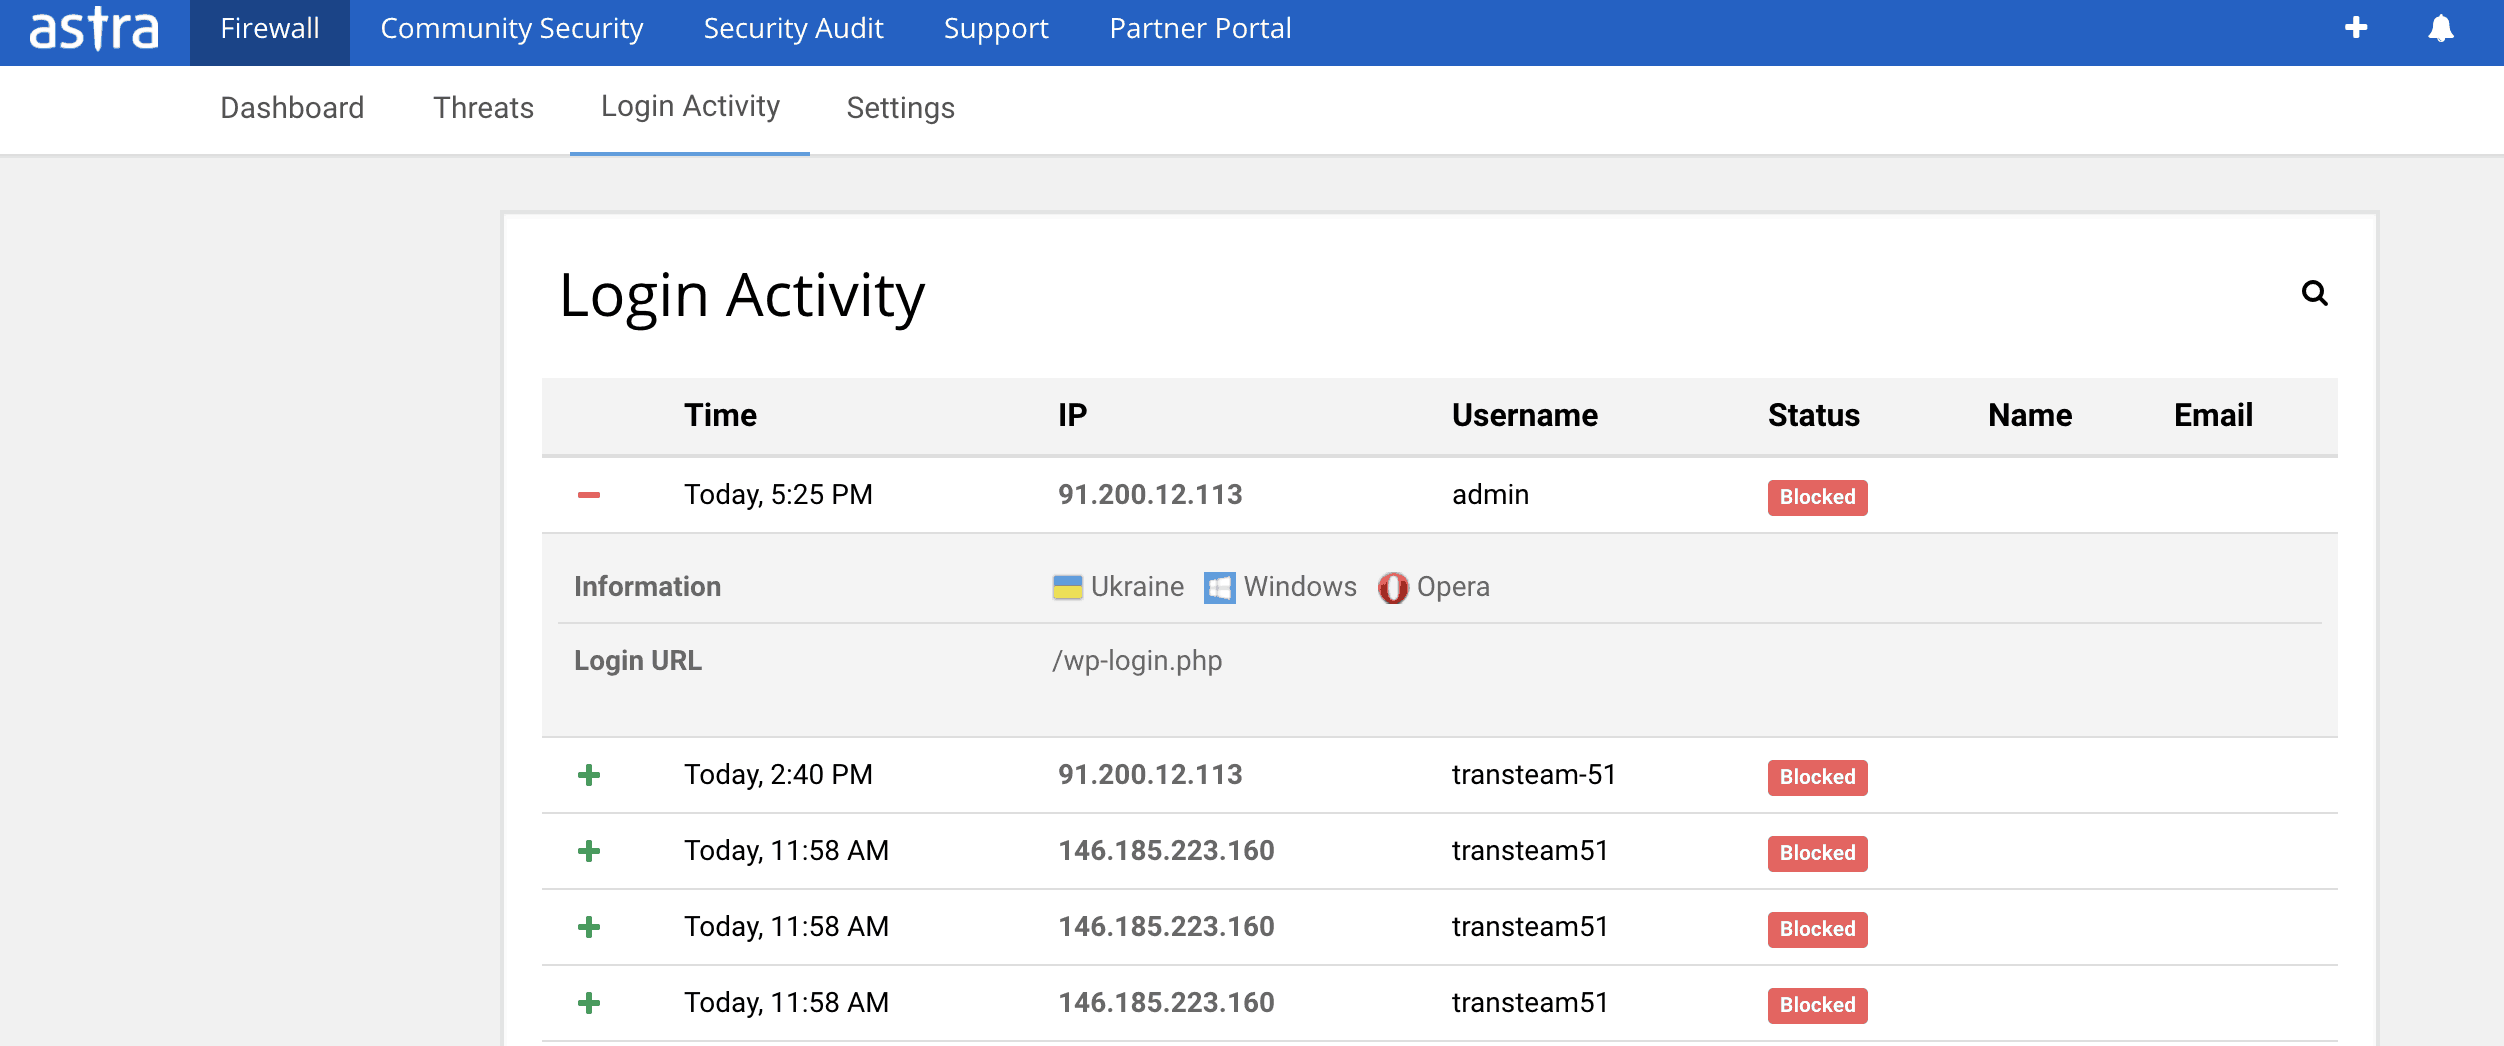
Still not sure of complete security? Astra keeps a tap of each successful & unsuccessful bruteforce attempt on your WordPress. You receive an hourly summary of all the unsuccessful and successful login attempts:


Astra Team


[…] that of ionCube-encoded files to compromise various websites. Among the affected ones were sites based on WordPress, Joomla, and CodeIgniter. The malware allows hackers to create a backdoor on vulnerable websites, […]